Monday, April 30, 2012
broken camera :(
My camera decided to stop working yesterday (it turns on but doesn't show anything on the display), so I am unfortunately going back on hiatus until I can either get a new one or be okay with posting iPhone pictures. Not sure how long that will be :(

Friday, April 27, 2012
oven roasted baby red (or yukon gold) potatoes

Over the past few months, I have made these potatoes at least 10 times. They have come out perfect every single time. They are easy too! Not too much prep work, and only 25-30 minutes in the oven. I made these with yukon gold baby potatoes once just to switch it up, and they were just as delicious. So just use whichever potato you prefer! (Or whichever is on sale!)
I have experimented with different spices, but I've found that my favorite combination is salt, pepper, paprika, and Buck's Seasoning. If you haven't tried Buck's, you definitely should. It's delicious on everything from burgers to fish to vegetables to french fries and more.
I didn't know Buck's was a local company (we're talking 20 minutes from where I grew up) until like High School. I can't believe that people who live outside of their distribution radius have never tried it! Man, you're really missing out.
Anyways, if you can't get your hands on Buck's, your favorite all-purpose seasoning would work just fine. D and I are also big fans of Old Bay seasoning.
Like I said, though, make this your own! Add whatever spices and flavors you like best! Garlic lover? Add some garlic powder. The world is your oyster! The following recipe is just my favorite combination of spices.
Oven Roasted Baby Red Potatoes
Adapted from Allrecipes.com
Yields 4 side servings
1.75 pounds baby red potatoes (this is the size bags they have at my local grocery store)
2 tablespoons olive oil
1/4 tsp Salt
1/4 tsp Pepper
1/4 tsp Paprika
1/4 tsp Buck's Seasoning
Preheat oven to 450 degrees. Rinse the potatoes and cut each in half.

Place all of the halved potatoes into a bowl. Add the olive oil and toss to coat.

Add the salt, pepper, paprika, and buck's seasoning. Toss to coat evenly.

Arrange potatoes cut side down on a baking sheet that has been sprayed lightly with cooking spray.

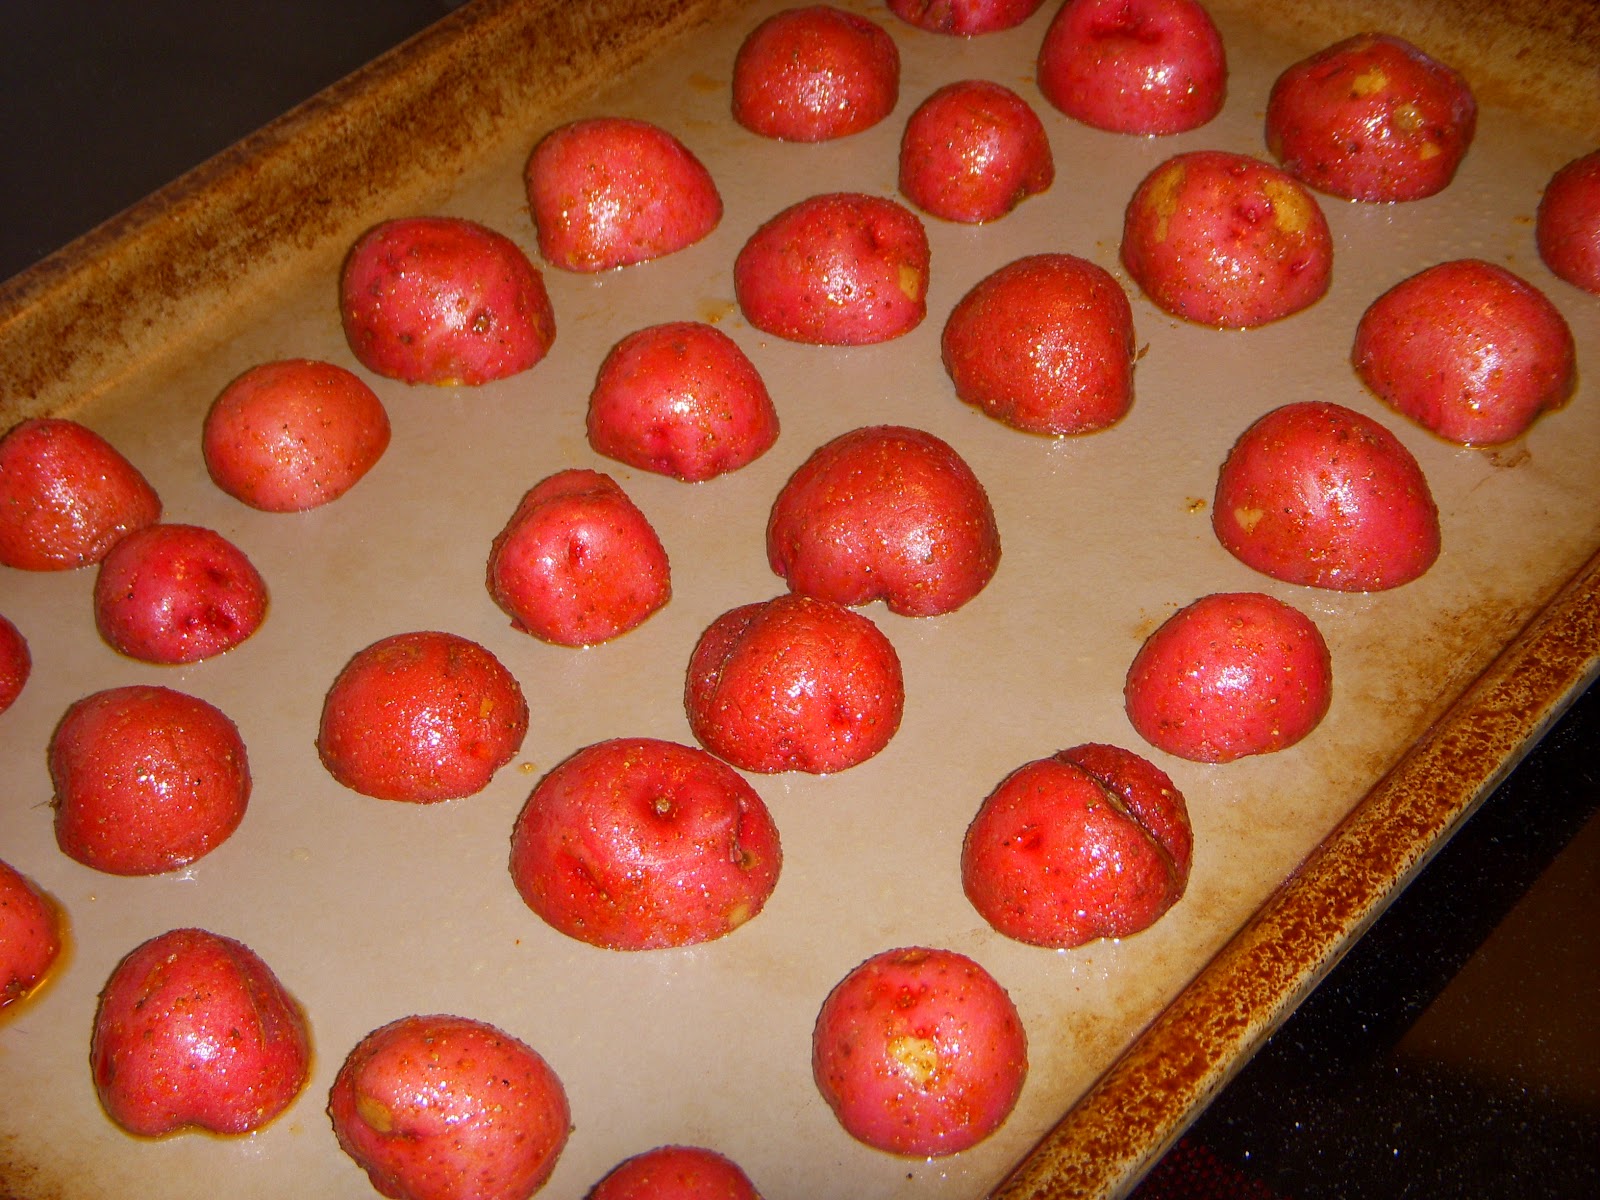
Bake 25-30 minutes, or until tender and golden brown.
Dip in ketchup and enjoy!
Thursday, April 26, 2012
what i ate wednesday.
Last time I did a "what i ate wednesday" (or wiaw) post, I took pictures of everything I ate on Tuesday and posted them on Wednesday. So in all fairness, that food was what I ate on Tuesday, but no alliteration = no fun. Agreed? Agreed.
But today is Thursday. So the food you will see really is what I ate on Wednesday. Enjoy!
Breakfast


Green tea with a little 1% milk in my new mug.
I promise, I do eat breakfast sometimes. I really need to work on that.
Lunch

For lunch, D and I ate at our favorite Thai place. We will really miss it when we move!

Tom Jerd soup. (Cabbage, carrots, tofu, and scallions)

Pad Guay Dteaw. (Pan fried noodles, cabbage, carrots, and chicken in a Thai soy sauce)
This is currently my favorite Thai dish! I can't get enough.

I drank this after lunch on the way to the mall! I was super thirsty and this hit the spot.
Snack

Popcorn at the movies. We saw Chimpanzee! A portion of the ticket proceeds went
to support the Jane Goodall Foundation. The movie was cute and the cause was great :)
Dinner
I could only eat about half of my Pad Guaw Dteaw at lunch, so I ate the rest for dinner!
I could only eat about half of my Pad Guaw Dteaw at lunch, so I ate the rest for dinner!
So there you have it! That's what I ate on Wednesday. What did you eat?
Wednesday, April 25, 2012
homemade snickers.
What better way to jump back into posting recipes than with one as delicious as this? I made these for D back on Valentines Day. Snickers are his favorite candy, and this means a lot coming from the guy who would love nothing more than to eat candy multiple times every.single.day.

When I saw this recipe on How Sweet It Is, I knew it would be the perfect Valentines Day gift for my candy-loving boyfriend. The recipe is actually quite simple to make, it just takes some time and patience. Basically, you make the first layer (chocolate), pour it in the pan, let it cool, and then repeat for the other 3 layers. Nothing about this recipe was hard, it just took a little time.

The finished product was really beautiful and tasted just like real snickers. I had one tiny bite for um... quality control... and believe me, they are phenomenal! Do yourself a favor and treat someone you love to some homemade snickers. They'll thank you!

Homemade Snickers
Recipe from How Sweet It Is
Makes one 9x13 pan
2 1/2 cups milk chocolate chips
3/4 cup peanut butter
1/4 cup unsalted butter
1 cup sugar
1/4 cup evaporated milk
1 1/2 cups marshmallow fluff
1 1/2 cups salted peanuts, chopped
1 tsp vanilla extract
1 (14-ounce) bag of caramels (the soft chewy kind. I used Kraft Caramels.)
1/4 cup whipping cream
In order to make cutting the finished product easier, I suggest using a disposable 9x13 baking pan (that's what I did).
To make the first layer (chocolate), melt half of the milk chocolate chips (1 1/4 cups) and a third of the peanut butter (1/4 cup) together on the stove or in the microwave until melted and combined. Spread evenly into the greased 9x13 baking pan (grease it well, I sprayed cooking spray all over the bottom and the sides). Let the layer cool and harden completely.
For the second layer (nougat), melt the butter in a saucepan over medium heat. Once melted, add the sugar and evaporated milk, stirring to dissolve. Bring to a boil. Once boiling, let the mixture cook for 5 minutes stirring occasionally. Next, add in the marshmallow fluff, 1/4 cup of the peanut butter, and vanilla, stirring until the mixture is smooth. Turn off the heat, add in the chopped peanuts, and then pour over the chocolate layer and spread evenly. Because the mixture is hot, you'll want to work quickly to spread it over the chocolate layer because it will start to melt the chocolate if you take too long. Let cool completely.
For the third layer (caramel), simply combine the unwrapped caramels and whipping cream in a saucepan over low-medium heat. Let melt, stirring occasionally, until smooth. Pour over the nougat layer and spread evenly. Let cool completely.
For the final layer (chocolate), simply repeat the steps outlined in the first layer. Combine the last of the chocolate (1 1/4 cups) and the last of the peanut butter (1/4 cup) in a saucepan to melt or melt in the microwave. Once combined and smooth, pour over the caramel layer and spread evenly.
Place pan in refrigerator for at least one hour before cutting/serving. If you used a disposable pan, you can simply cut the corners of the pan and peel it off of the finished product so that the whole giant bar of snickers can be set onto a cutting board and cut. You can see from the pictures that I cut them a little bit smaller than normal snickers size, but most people that ate them said they were still too big! Next time I would cut them into "fun-size" snickers size pieces.
As a final note, I used the same medium-sized saucepan to melt each layer. Because the layers have to cool completely before adding the next layer, I found I had enough time to wash my saucepan and utensils in between each layer before beginning the next one. That way, at the end of the process, I only had one saucepan, one wooden spoon, and a few measuring cups to wash.

Tuesday, April 24, 2012
i'm baaaaack!
So the last time I posted was November 11, 2011. That's like 5 and a half months ago, guys! Jeeze louise. Here's what happened: The end of the semester got busy, I got lazy, Christmas kept me preoccupied, I enjoyed winter break from college, and then my last semester ever began and I just decided that maybe it would be better (read: I'm already a big enough procrastinator as it is) if I just waited until I was done with school to get back into blogging.
And so... here I am! I graduate in 18 days, so I am making the executive decision that school is close enough to being over that I can justify giving a little bit of my time to blogging. If you want a quick glimpse at what I've been up to the past 5+ months, just check out my instagram feed!
But other than graduation, here's what's been going on:
1. I got a new job for after graduation, so D and I will be moving! We are excited to explore a new place, go on bike rides, try new restaurants, and have adventures!
2. Our new apartment allows pets. We are super excited to finally be able to get a dog! You better believe I will be exploiting his/her (we're hoping her!) cuteness all over my blog and instagram. Who doesn't love cute pet pictures?
3. I've been working on losing weight since about the second week of January. It's still a work in progress, and I hope to share the whole story with you someday once I'm in the "maintaining" phase, but I've lost about 30 pounds so far. It's really exciting and I'm happier with my body than I have been since high school.
4. Because of #3 (and the fact that D says my baking makes him fat), there hasn't been a whole heck of a lot of baking sweets going on 'round these parts. I'm hoping to get back on that horse, because I really do love baking and taking pictures, but I can't promise anything. Maybe you can expect some healthier recipes?
I'm so happy to be back and I look forward to sharing with you :)
Friday, November 11, 2011
pork fried rice.
Guess what I get to do this weekend? I get to cook dinner for more than two people!! Tonight I'm making BBQ on a Bun (family recipe that is similar to sloppy joes) for two of our friends that are coming over for dinner, and Sunday we're having FOUR people over for dinner! D will be making traditional spaghetti sauce and meatballs, and when I get home from work I am thinking about making an alfredo sauce as a second alternative. We are also going to have two different types of pasta, so it will be a mini pasta bar!
So what do I have for you today? Pork fried rice! D tried Chinese food for the first time a few months ago (I know... first time!?), and he has decided that he loves pork fried rice. So I did what anyone would do- tried to make my own version at home!
This was probably the 4th time I've made it, and I think I have it down now, so I will share it with you! Remember, you could use chicken or shrimp instead, and add more veggies/spices. This is just a basic recipe that you can tweak to your own liking!
So, that being said, this week we have had Pork Fried Rice AND Beef Stew. Let's just say that D is in heaven (And he went back for seconds- or thirds- of each!). I plan on giving you all my beef stew recipe next week- so keep a look out! ;)

Pork Fried Rice
2-3 thin-cut boneless pork chops, fat removed and diced fairly small
2 cups cooked white rice (prepared using box directions)
1/2 package frozen mixed carrots and peas (the kind that you can steam in the microwave), cooked
3 eggs
2 cups cooked white rice (prepared using box directions)
1/2 package frozen mixed carrots and peas (the kind that you can steam in the microwave), cooked
3 eggs
soy sauce
sesame oil
olive oil
1/2 tsp onion powder
1/2 tsp garlic powder
salt and pepper to taste
Once the pork is done, add the white rice and veggies. This is when I add the soysauce. Using the little hole on the top of the soy sauce bottle, I simply pour soy sauce onto the pile of rice until it turns brownish, stir, taste, add more soy sauce if needed, stir, etc. Just make sure you taste as you go because you don't want it to be TOO salty. Remember, you can always add more if needed, you can't take it away. At the last minute, add the eggs back into the rice. Serve hot! I like to add a little hot sauce to my plate ;) Enjoy!

Wednesday, November 9, 2011
three cheese and bean quesadillas.
Remember the other day (okay, over a week ago..) when I made quesadillas at home for the first time? Well.... I'm kind of in love with it. They are so, so, so easy to make!
And don't get me wrong, I love me some PB&J (my parents made homemade grape jelly this year.. lets just say next year, I will be participating... and making sure that I get to take at least 10 jars home with me.), but sometimes a hot, cheesy quesadilla just sounds like heaven. You know?
So I think you should save those extra tortilla shells from Taco night and make quesadillas the next day. I know. I'm full of good ideas.
Now I'm not going to sit here and tell you that this is a "recipe", because it's really not. Just add whatever you want! Cooked chicken, pork, steak, hamburger... anything you have leftover will work! This time, I'm going to show you how to make three cheese and bean quesadillas.
First, spray a large pan (big enough for whatever size quesadillas you have) with cooking spray and turn on the heat to about medium. Put a tortilla in the pan and put your first cheese in!
My first cheese was some swiss that I had leftover from sandwiches:

Then add your next cheese. Mine was some shredded sharp cheese that I had leftover from making Chicken Curry.


Next, I added some pinto beans that were leftover from last week when I made chicken quesadillas. I just poured all the extras into a tupperware container and kept them in the fridge. Perfect!

And the last thing that I added was some smooth taco sauce. The only other thing that I would have added if I had some is tomatoes diced up. I love tomatoes!

Let it cook until you lift up the edge (with a spatula!) and see that it is toasty brown and delicious (to your liking). Simply remove it from the pan with a spatula, put it on a big plate, and cut it into 4 pieces! I used a pizza cutter for this. It worked perfectly!


Mmmm. Cheesy beany melty deliciousness. Feel free to dunk in your favorite queso or salsa. :)
Adios friends, happy hump day!
Subscribe to:
Posts (Atom)